Create Form In Sharepoint
Create Form In Sharepoint - Go to microsoft forms with your microsoft 365 school credentials, microsoft 365 work credentials, or microsoft account (hotmail, live, or outlook.com). Infopath saves a copy of the form template as a set of files inside the folder. Go to the home page of the site. Hover around the section where you want to add the fillable form until you see a plus. Add a page name in the title area. To customize the appearance of the image, you can set its properties. Web create a form create a form select new form or new quiz. Open a new page on a sharepoint site, or create a new page. In sharepoint go to your site. Use the app launcher and navigate to “sharepoint”, and click on it.
Hover around the section where you want to add the fillable form until you see a plus. You can also log in to office.com, look for the microsoft 365 icons on the left, and then select forms. Open a new page on a sharepoint site, or create a new page. As we’re beginning from scratch, i’ll show first how to create a new page before going on. On the file menu, click save as source files. Use the app launcher and navigate to “sharepoint”, and click on it. To customize the appearance of the image, you can set its properties. With microsoft sharepoint designer 2010, you can create and customize these forms to make it easier for users to add and update items in a list. Web add and publish a page. Web start a new form.
Web the best way of creating fillable forms in sharepoint online: Web add a user profile photo. Infopath saves a copy of the form template as a set of files inside the folder. Go to microsoft forms with your microsoft 365 school credentials, microsoft 365 work credentials, or microsoft account (hotmail, live, or outlook.com). Open a new page on a sharepoint site, or create a new page. As we’re beginning from scratch, i’ll show first how to create a new page before going on. In the browse for folder dialog box, select an existing folder in which to save the form files, or create a new folder, and then click ok. A page name is required to save the page. Web create a form create a form select new form or new quiz. Web how to create a poll by using microsoft forms?
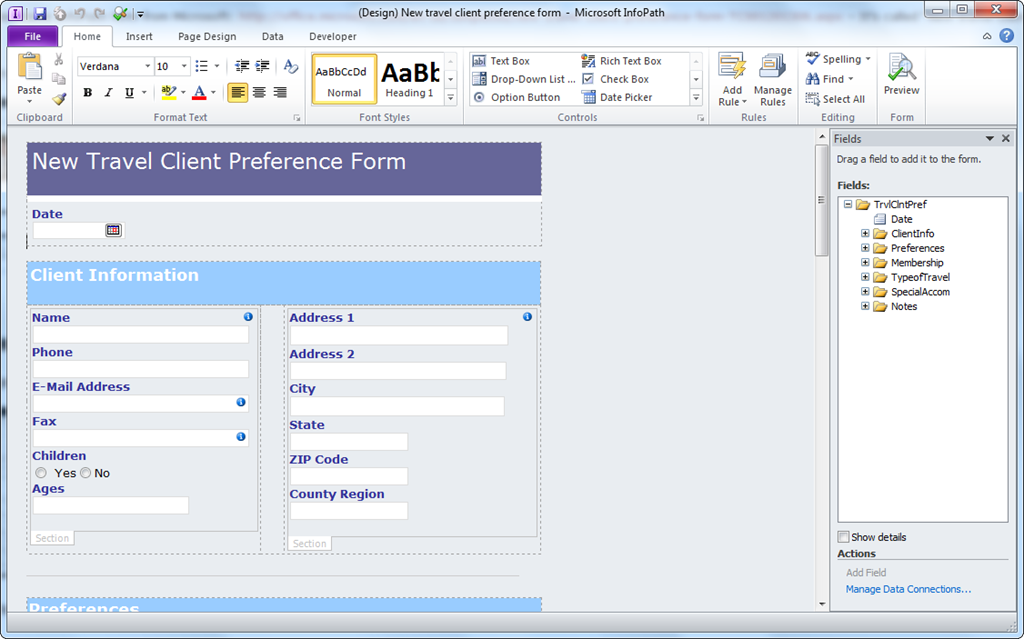
Walkthrough Create Form with InfoPath and use it in a SharePoint 2010
Select + new, and then select page. Go to the s ite where you want to add a page. In sharepoint go to your site. On the insert tab, select media > image. With microsoft sharepoint designer 2010, you can create and customize these forms to make it easier for users to add and update items in a list.
Sigh… SharePoint Forms…
Log into your office 365 account, open sharepoint, and open your team site. On the file menu, click save as source files. In sharepoint go to your site. Use the app launcher and navigate to “sharepoint”, and click on it. Go to the home page of the site.
Microsoft SharePoint Primer & Resources Everything You Need to Know
On the insert tab, select media > image. Log into your office 365 account, open sharepoint, and open your team site. Web how to create a poll by using microsoft forms? On the file menu, click save as source files. In sharepoint go to your site.

How to create a form in SharePoint Designer 2013. Infopath alternative
Add a page name in the title area. Infopath saves a copy of the form template as a set of files inside the folder. Web add a user profile photo. You can also log in to office.com, look for the microsoft 365 icons on the left, and then select forms. Choose a page template to start with.
Creating Forms Sharepoint 2016 Form Resume Examples qeYzvdLY8X
With microsoft sharepoint designer 2010, you can create and customize these forms to make it easier for users to add and update items in a list. See the customize the title area. Type a title for your form. To customize the appearance of the image, you can set its properties. Go to microsoft forms with your microsoft 365 school credentials,.

Amol Ghuge's SharePoint Blog site creation request form infopath
Use the app launcher and navigate to “sharepoint”, and click on it. Choose a page template to start with. Add a page name in the title area. Web start a new form. Web the best way of creating fillable forms in sharepoint online:
How to create a form in SharePoint Designer 2013. Infopath alternative.
Go to the s ite where you want to add a page. On the insert tab, select media > image. In sharepoint go to your site. Log into your office 365 account, open sharepoint, and open your team site. First sign in to office 365.

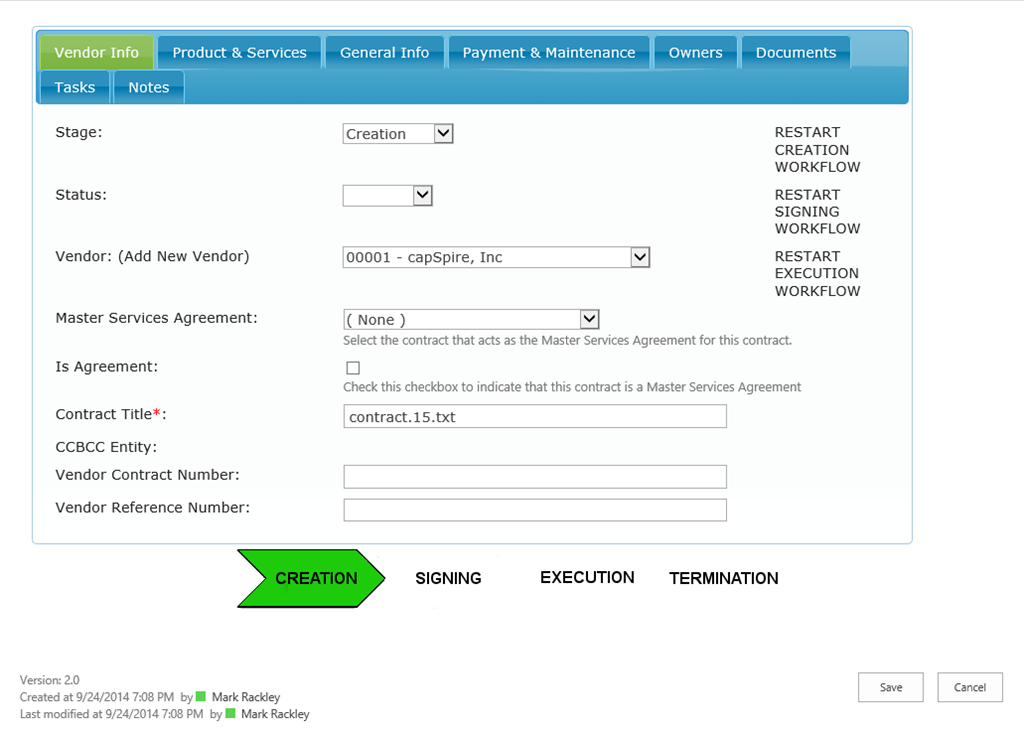
How is this form created in SharePoint 2010? SharePoint Stack Exchange
First sign in to office 365. Web how to create a poll by using microsoft forms? Web add and publish a page. Web create a form create a form select new form or new quiz. Web start a new form.
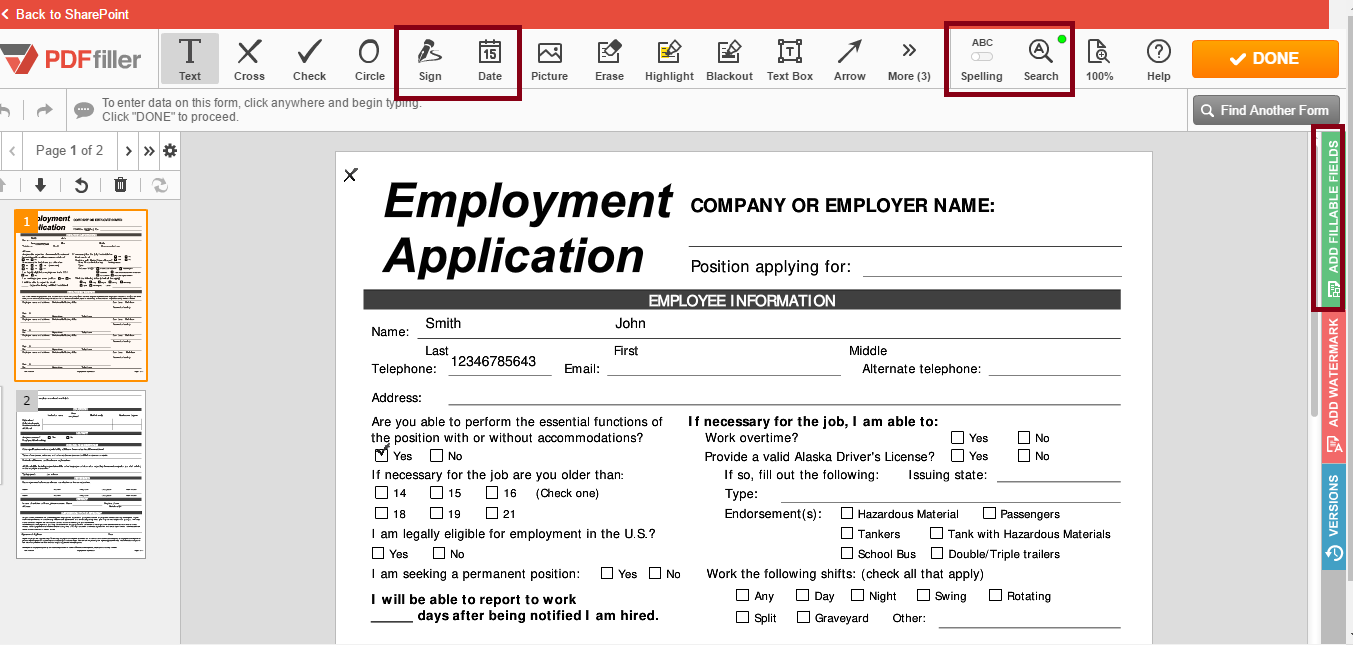
Create and Edit PDF and Word Forms in SharePoint pdfFiller
Infopath saves a copy of the form template as a set of files inside the folder. To customize the appearance of the image, you can set its properties. On the insert tab, select media > image. First sign in to office 365. Web create a form create a form select new form or new quiz.
Tap Into the Power of SharePoint Forms ShareGate
Infopath saves a copy of the form template as a set of files inside the folder. To customize the appearance of the image, you can set its properties. Web add and publish a page. You can choose to add choice, text, rating, or date questions. Add a page name in the title area.
Hover Around The Section Where You Want To Add The Fillable Form Until You See A Plus.
On the file menu, click save as source files. Add a page name in the title area. Type a title for your form. Go to the home page of the site.
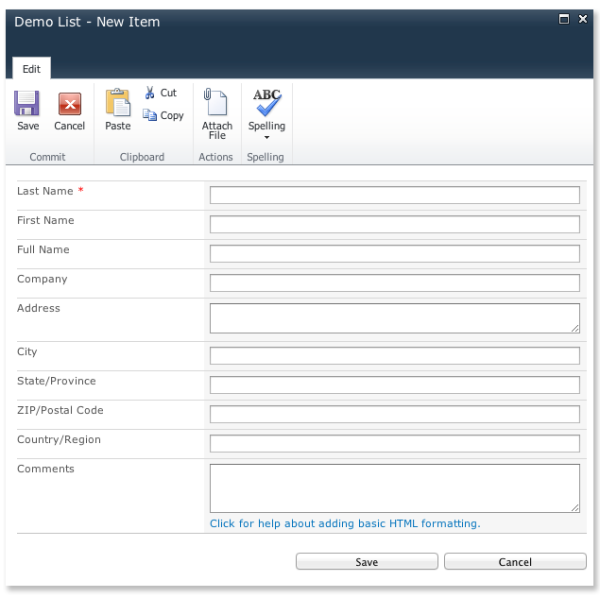
Web Create A Custom List Form Using Sharepoint Designer Sharepoint Designer 2010 Sharepoint Lists And Libraries Contain List Forms That Allow Users To Display, Edit, And Add Items To A List Or Library.
To customize the appearance of the image, you can set its properties. On the insert tab, select media > image. See the customize the title area. Use the app launcher and navigate to “sharepoint”, and click on it.
In Sharepoint Go To Your Site.
Web the best way of creating fillable forms in sharepoint online: Web create a form create a form select new form or new quiz. Go to the s ite where you want to add a page. You can also log in to office.com, look for the microsoft 365 icons on the left, and then select forms.
Open A New Page On A Sharepoint Site, Or Create A New Page.
You can choose to add choice, text, rating, or date questions. Web how to create a poll by using microsoft forms? Select + new, and then select page. In the browse for folder dialog box, select an existing folder in which to save the form files, or create a new folder, and then click ok.